Dec 15, 2024
Breaking Down Scroll Animations in Framer
DESIGN
Ever struggled with scroll animations in Framer? The secret lies in mastering sticky position + timeline triggers. Let me break it down for you.
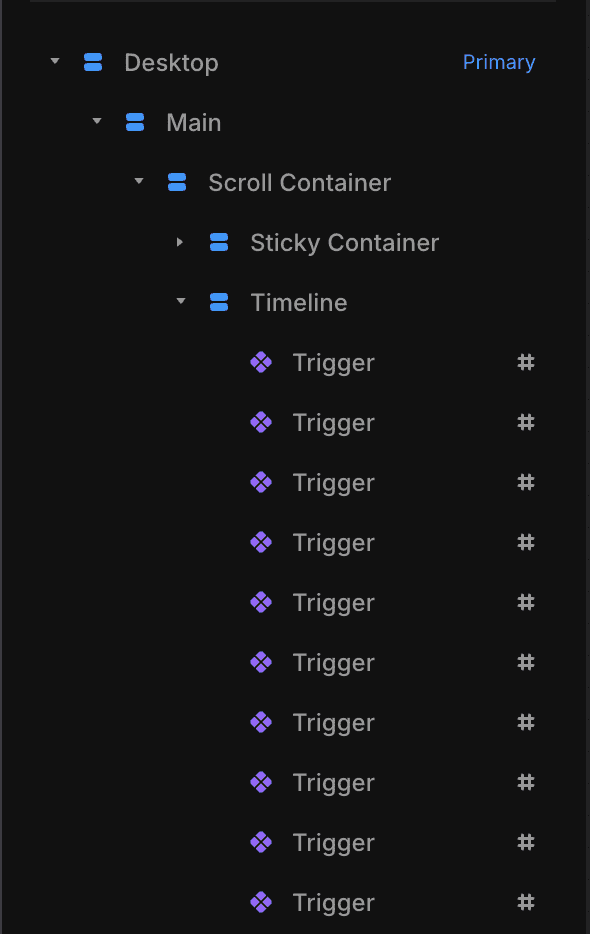
In Framer, you have 4 options, when establishing how you want an element to be positioned on the screen; fixed, relative, absolute, and sticky. Sticky tells Framer that you want the element to stick to the top of the screen for the scroll duration. Next up, timeline triggers. Timeline triggers are fixed height frames with a named scroll section applied to them and wrapped in a vertical stack. The layers panel in Framer would look something like this...

shoutout to @learnframer for the Trigger component
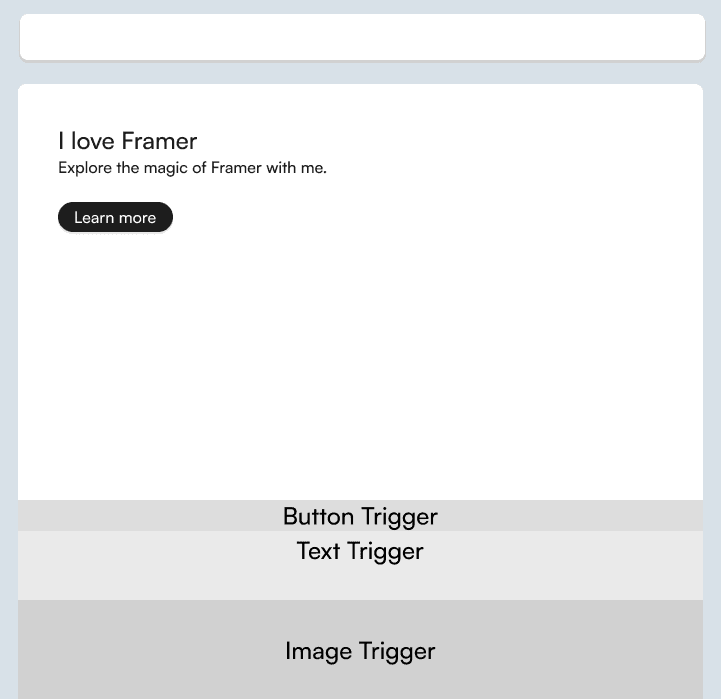
Each frame triggers the start of a different scroll based animation. The height of the frame determines the duration. If you want animation's to happen one after the other then the Trigger frames should be positioned relative.
A visual would look something like this

However if you want an animation to occur at the same time as as the previous animation as opposed to in a linear fashion, you can set the position to absolute. This will let you freely place the frame on the timeline and have two different animations happen at the same time. A visual would look something like this

You might wonder, why don't we just use the same scroll section for both animations and I'd say I love how you're thinking. That's absolutely a solution. Using a different frame is beneficial when you want to have the animation finish at a different time. Remember, the height of the frame controls the animation duration.
So, powered with these techniques you can have content stick on the page and have various animations happen as the users scrolls.